Mattoni's Cooking Blog

A veg*n cooking blog with photos, recipes, hints, secrets, and street cred. Get with it, sucka.

January 15, 2007

Paella

A long day of doing crossword puzzles and watching "Kids in the Hall" led me to believe it was time to set aside some much needed time for myself (har). Winter is a real downer for me. Like it or lump it, I suppose. After running down the street and back for 45 minutes, I got hungry.

My mom gave me a paella pan and some special rice for Christmas and I hadn't had a chance to use it until now. San Chez, downtown, makes very good paella, if you've got else to to do for 45 minutes. But, it's snowing out (not good for biking) and I've got no one to bring, so homemade was the natural choice.

After making this, and giving some to my friend Abby, we decided that the fennel seeds can be left out.
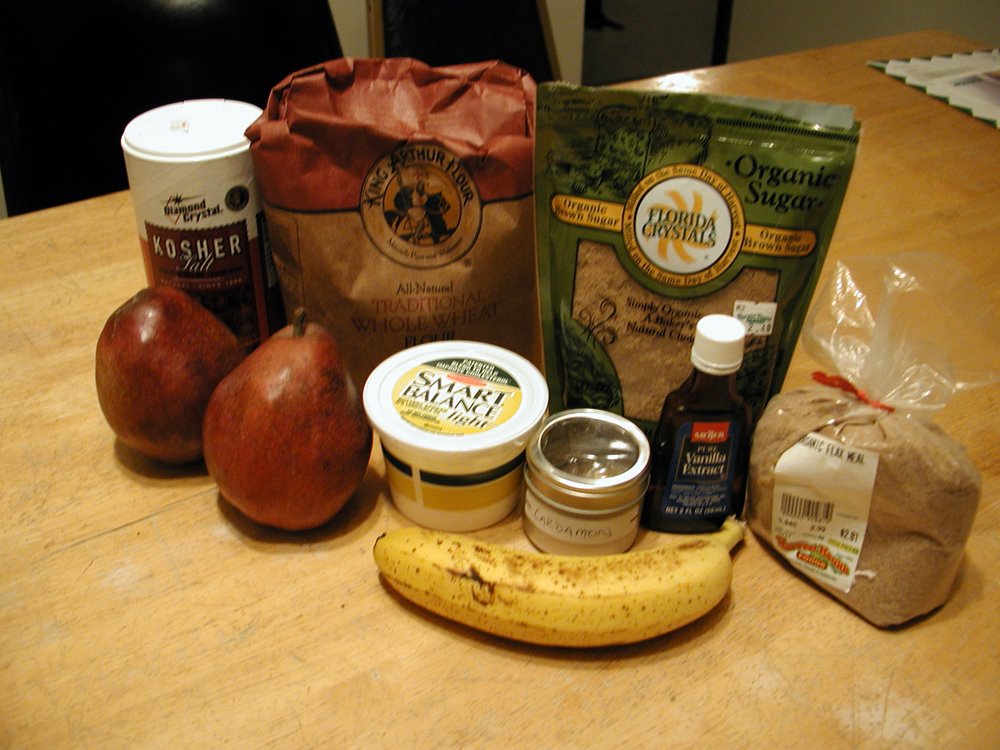
Ingredients:
Olive oil (not pictured)
3 tablespoons minced garlic (about 3 cloves)
1 medium red onion
1 Tablespoon of fennel seeds
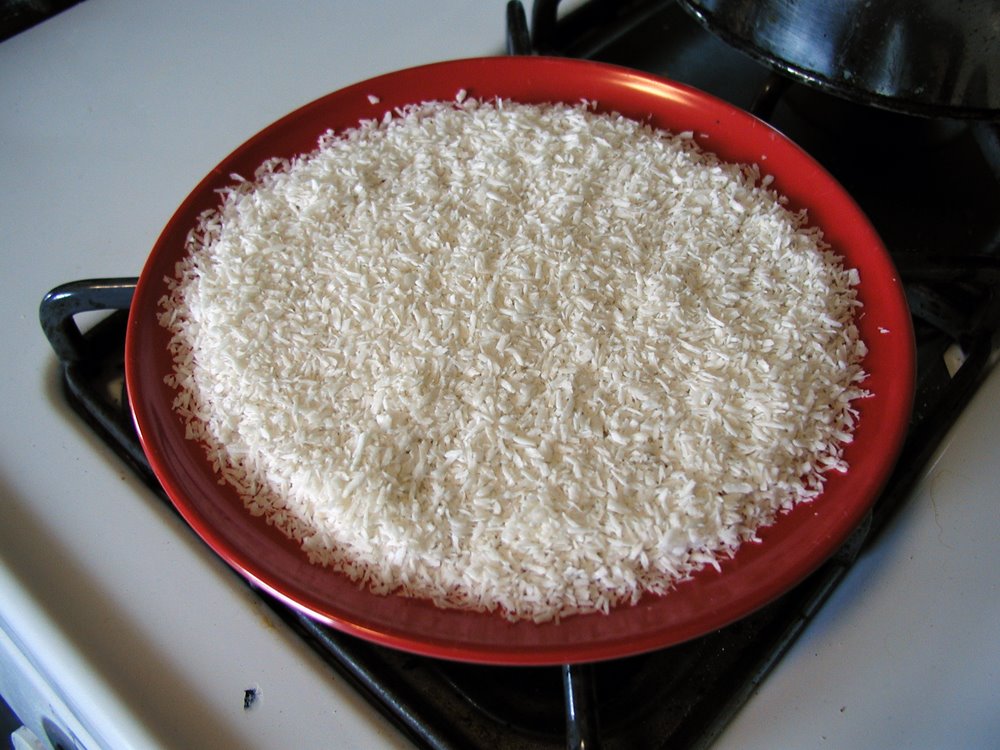
2 cups paella rice (arborio is apparently a good substitute)
3 medium tomatoes
A few strands of saffron
1 teaspoon thyme
.5 to 1 teaspoon cayenne
16 oz vegetable broth (I made my own)
1 cup to 1.5 cups dry white vermouth
2 red or yellow bell peppers (the green are not as sweet. I think it's the capsaicin that developes differently)
1 cup Brussells sprouts, or broccoli
1 can (14 ounces) of quartered artichoke hearts
1 cup mushrooms
1 cup snow pea pods
Cilantro for garnish


Start off by chopping up all your vegetables. Put the onions (diced) in one pile, the tomatoes (sliced thin) in another, and everything else (chopped into 1-inch pieces) in another.


Paella pans have little indentations on the bottom, kind of like golf ball dimples. These help distribute heat evenly, so the rice cooks like it should. They also keep the pan ridgid and prevent warping. Some people say the dimples are just there to make the pan look like an old-fashioned hammered pan. Others hold none of this to be true. Armed with this incediary grasp of paella trivia, put the pan on medium heat and drop a few tablespoons of olive oil into it.


Throw your onions, garlic, and fennel (optional) into the pan and sweat them out.


After a few minutes, add the rice and spread it around. You'll want to cook this rice in the onion and garlic sautee for about a minute.


Now add the vegetable broth, vermouth, tomatoes, thyme, saffron and cayenne.


Stir this all up and bring it to a boil.


Add the rest of the vegetables (all except the pea pods) and bring it to a boil again. Then, turn the heat down and simmer the paella, while covered for about 20 minutes, or until the rice has absorbed the liquid. I used a large round pizza pan to cover it. If the rice is still a little firm afterwards, feel free to add more vegetable broth and cook longer.

Here's another bit of trivia. Sometimes you will get rice that sticks to the bottom of the pan. This is called socarrat and it's actually the sign of good paella. Some people consider it an aphrodisiac. I will have to test this out, as my Mexican relatives never let on to the secret of their own latin flavor. Make sure you don't go too far trying to cultivate a crust of burnt rice on the bottom of the pan, though. Too much socarrat will make the paella taste like burning.


Now you can add your pea pods. They're delicate and lose texture faster than the other vegetables, which is why you add them last. Cook the paella, uncovered, for another few minutes and you're golden.


Traditionally, paella is eaten right out of the pan. If you've got company over, hand out the silverware and go to town (at the dinner table, of course). If you're by your lonesome, use a bowl. If your girlfriend is over, share a bowl and eat it while watching the "Free Tibet" concert DVD you bought years back.

Variations:
Traditional paella uses chicken, sausage, and seafood. Mine obviously doesnt. If you want a protein substitute, try adding seitan or tempeh when you add the tomatoes, liquid and spices.

Labels: , , , , , , ,

September 05, 2006

Tamale Pie

I borrowed most of this recipe from "Let's Get Baked" a podcast by some guys from Halifax, Canada. Their show is pretty righteous. They come up with good ideas for recipes and the musicians they invite to help are typically very entertaining. There's all sorts of good things to like about it, not the least of which is that I can listen to just about one whole episode during the time it takes me to get from my house to the other side of town on bike. It's a perfect fit, much like this recipe.

This tamale pie basically takes a buch of ingredients you would find in a vegetarian burrito and puts them between layers of baked corn masa, which is found in a tamale. Simple as that.

I started out with a generous mix of:
black beans (cooked in a slow coker)
diced tomatoes
chopped green pepper
sweet corn
a bit of minced garlic
and a teaspoon or two of chile powder

I made a little too much, so as to have some to bring to work the next few days.

Now, you mash everything together for a bit. Doing it in the slow cooker makes the job easy enough. Mash for a minute or so, ut stop before you mash all the beans. You want a few beans to stay in tact, just for texture.


For the crust, you're going to need:
A pot of boiling water (2 1/2 cups)
1 1/2 cups cornmeal
1 teaspoon of salt
1/2 teaspoon of chili powder


Mix up all the ingredients into the boiling water and stir constantly until it thickens. It will get very thick -- thick enough to stand a spoon up. It will also burn if you don't keep stirring.


Take the thickened crust mixture and spread some onto the bottom of a casserole or pie dish. Also, during this time, preheat your oven to 350 degrees.


Now spoon the bean mixture in until it reaches just below the top of the dish. This is your pie filling, so make sure you don't add too much that you can't put a crust on it.


Spread the rest of the cornmeal mixture on to the top of the filling. Spread it all the way out to the sides so it cooks evenly.


Bake it for about 30 minutes, or longer, depending on how crusty you like your pie.


The end result should be something like this.


This stuff has protein, carbs, fiber, and pretty much all the good stuff you need, without too much fat or sodium (depending on how you salt it). I would imagine some extra spices or even salsa might be good on top, if you're feeling up to it.


Milkshakes

Milkshakes are easy to make and you can hide a bunch of good stuff in them. My favorite is strawberry banana for the potassium alone. Above and beyond that, it's always a good idea to have molasses (blackstrap) on hand for some extra iron and a little sweetness, flaxseeds or ground flaxseed meal for omega 3s, and possibly even benefiber, soy protein, or a green food product for a healthy additive.

The standard recipe I've used is:
8 to 10 ounces of soy/rice/almond milk
8 ice cubes
1 Tablespoon molasses
2 ripe bananas
1 cup strawberries, hulled
1 teaspoon flaxseed meal


You blend all this up and pour it into a glass. It's good pretty much any time of the day.


Variations: Blueberries and peaches make good milkshake fruits. If you have any on hand, pineapple is a great one to use -- it adds a little extra sweetness, too.

Gazpacho, The story of

Gazpacho is a soup. Gazpacho is a salad. Gazpacho is blended, diced, spicy, refreshing, and countless other descriptives. There are many ways to make this traditional Spanish soup/salad, one of my favorite being to chop up a bunch of vegetables, mix them with some spice and let soak in its own juices.

This soup is most popular during warmer months. It's typically eaten cold and the amount of spiciness is up to you.

Many people think that gazpacho is just a Spanish version of tomato and vegetable soup. It's not necessarily the case. Gazpacho is traditionally served with bread on the bottom, olive oil, garlic, and vinegar, among other vegetables. Tomatoes and peppers weren't even brought to Europe until after Columbus' fateful trip.

One way to get spice into gazpacho is to use dried pepper. I use ancho, chipotle, or japone. Depending on the season, you might be able to find some fresh habaneros or serranos. Bell peppers are always available, especially during the summer, when your local farmers markets will have them cheap. If you find you've added too much spice, you might want to serve it with more bread or a healthy dose of cilantro or mint. Cilantro and mint not only provide good contrast of flavor but they are traditional Mestizo spices, too. Represent.

This is the recipe I tried:
4 roma tomatoes, diced
2 cups sweet corn
2 cups assorted bell peppers, diced
1 medium red onion, diced
1 medium cucumber, sliced
2 Tablespoons olive oil
1/2 cup red wine vinegar
1 Tablespoon cilantro, chopped
A few stalks of celery (note: better to go easy on this as too much will be bitter)
3 cups stale bread, cubed

Mix everything but the bread cubes together and put it in a large bowl. If you want the flavors to be less pronounced, with less contrast, let the gazpacho sit in the fridge overnight. When you serve the gazpacho, put the breadcubes in the bowl first and spoon the vegetables opn top.

Gazpacho goes very well with sangria or a lime rickey.


Caribbean Chili

If you could make one thing for the rest of your life, only one thing, what would it be? For me, this one thing would be chili. Over the last year-and-a-half, since I've obtained a slow cooker, I've probably made enough chili to feed every kid whose ever been on Double Dare, their parents, and Marc Summers.

Speaking of which, did you know Marc Summers has an intense case of OCD? He freaks out when things get dirty, kind of like myself. With that in mind, slow cooker chili is a great idea. You don't need much else besides a knife and a cutting board and perhaps a sink. A good clean mixing spoon is also essential.

For this recipe, featured at the recent Labor Day Jello Wrestling fiasco, I decided to try a Caribbean style of cookery.

Here is a good vegetarian chili base to start with:

2 cups kidney or black beans, cooked
4 cups tomatoes, halved
1 Tablespoon molasses
1/4 cup apple cider vinegar
1/2 cup water
2-3 bell peppers, chopped
1 1/2 teaspoon cayenne
1 teaspoon cumin
1 teaspoon oregano

Let this all cook on low, all day long. At least 8 hours. From here you can venture out to places unknown to common chili. Here's what I added to get this version of Caribbean Chili:

3/4 cup shredded coconut
2 cups pineapple, chopped
1/4 cup soy sauce
1/2 teaspoon ground cloves
1/2 teaspoon allspice

You can let this sit for an additional hour or two before serving.


Sandwich bread (beany version)

Using mashed beans in bread might seem unusual but I have found it to work quite well as a way to get protein into a food that's already high in iron and fiber. This is quite a benefit. Adding bran takes out some of the heft, while adding even more fiber. What started out a a simple recipe using beans, yeast, flour and milk has grown to accomodate a number of extra ingredients. This recipe is my favorite so far and really shows the versatility of a bean mash and flour base.

There is a lot of sitting time when it comes to this recipe, too, so don't be afraid to schedule a few things for the day or you might be sitting around for hours with nothing to do.

1 cup soybeans, cooked
4 cups all-purpose flour
1 cup whole wheat flour
1 cup wheat bran
1 cup rolled oats
2 cups milk
1 1/2 Tablespoons molasses
2 packages yeast
1 cup water
1/4 cup warm water
1 teaspoon salt


Blend up the beans with an equal amount of water (1 cup).

Dissolve the yeast in 1/4 cup of warm water. This should take around 10 minutes.

Sift together the all-purpose flour, rolled oats and wheat bran in a large bowl.

Once the yeast has dissolved, add it, the bean mash and milk to the bowl and mix well. The consistency should be a little sticky yet. Add the whole wheat flour until you get a soft dough.

Knead the dough for 5-8 minutes and let it rest in the bowl, covered in a warm spot.


Let the dough rest and expand for at least an hour.


Punch the dough down and separate it into two loaves. Let these sit for an additional 45 minutes.


After all this waiting, you can put the loaves into a 350 degree oven for about 50 minutes. I drizzles molasses on top, to give them a marbled look.


May 07, 2006

Tamales for your whole town

I'm not going to lie to you. Tamales are a pain in the a**. My grandmother makes them once a year, and now I understand why. Of course, it's best to make a lot when you do. Tamales are not something you would just make one or two of for lunch. I made 40 because our Cinco de Mayo party (Brandon's birthday) was the day after.

Tamales are basically a Mexican handheld version of what Americans call a "sandwich." The ingredients can vary but there are thre main staples of the tamale -- filling, masa and corn husk.
For the filling in these tamales, I simmered some black beans in a generous helping of ancho chilies, onion, garlic, molasses, and hickory smoke flavoring. From there, I got a little creative.

Ingredients:
Filling (somehting a bit thicker than chili, possibly some TVP with your favorite spices)
Mango
Masa (I'm using instant...it's speedier)
Corn husks
Twine or some good, durable equivalent

You will also need a big pot to steam them in.

Make sure your filling is all ready.


The instant masa usually has instructions for making tortillas (or tamales if you're lucky) on the bag. The kind I used only needed water for the recipe. Mix the masa according to the instructions.


During this time, boil your corn husks in some water. You don't have to cover them, just put a few inches of water in a big pot and turn it up high. These things have to boil for a few minutes so don't wory about hurrying through the next step.


Now you can cut up the mango into 2-3 inch slices. Mango is obviously not a traditional tamale ingredient but this was for Brandon's birthday so I let my hair down a little. Haha...get it? It's funny because I shave my head...meh, tough crowd. Actually, I;m using mango because I'm on this "contrasting yest complimentary flavors" kick and the sweet mango goes great with the spicy/bitter ancho chile.


Once your corn husks have been boiling for a while and are fairly pliable, take them out a few at a time and lay them on a towel. This will let them dry off a little while you make the tamales.


Each corn husk should get a little ball of masa. You can press the masa down with your fingers. I've seen examples of people using something that looks like a plaster knife to spread the masa but I'm not made of money and I'd rather use my hands. You want to spread the masa over the middle 3/5 of each corn husk.


On the flattened masa, add a spoonful or two of filling and a slice of mango.


Each tamale needs to be hand rolled first, then folded up from one end (the pointy end), then tied with the twine. After a few, you will learn how to position the masa to best accomodate this.


I think it's a good idea to have a bowl set aside to place the finished tamales in before you steam them.


Once you've had your fill of making tamales, you neeed to steam them, every single one. Put them all in a big steaming pot, making sure the water level doesn't reach the bottom of the tamales. You will have to steam them for a while to thoroughly cook the ingredients, so have a glass of water handy to replenish the pot when all the water evaporates.

Your finished tamales will be the talk of the town, and of any Cinco de Mayo party. Who knows, they might even get you a date.


Variations:
Not everyone is familiar with making tamales so don't try to get too creative. If you are going to experiment with anything, do the filling. I would say the spiciness of the filling can span a pretty wide range. Ancho chilie has relatively little heat compared to other chilies. Dare you try the japone? Dare you?

April 30, 2006

"French" Toast with the Most

It's amazing I haven't posted something in this category yet -- one of the most important things in American gastronomy. It's the first question I ask myself every day, before I ask myself if I really want to get out of bed in the first place. What's for breakfast?

Saturday, breakfast was French toast.
"But French toast has eggs!" you spout.
"Well, this kind doesn't," I retort, sly as a fox.
It's not your momma's French toast (guitar riff wails in background).


Using a batter of mainly soy milk and rice flour, you can create seemingly lifelike "French" toast in the comfort of your own home. The batter is thick enough to make a good crust, and allow for some other ingredients to be stuck on, like coconut (which I used but totally forgot to include in the ingredients photograph). That said, let's get to work.

Ingredients:
A few slices of your favorite (sturdy) bread
1 cup soy milk
1 1/2 cups shredded coconut
1/3 cup rice flour
2 tablespoons flaxseed meal
1 tablespoon brown sugar
3 teaspoons cinnamon
1 teaspoon nutmeg
Some vegan margarine (to grease a skillet)
Some good fruits for garnish (I'm using kiwi and strawberry, which go well with the coconut)


Mix the soy milk, rice flour, flaxseed meal, cinnamon, and nutmeg together and let it sit for at least 10 minutes. You might even want to zap it for 20-25 seconds in the microwave so it will mix easier.


Get your bread ready.


Spread the shredded coconut out on a plate, wide enough to dredge the bread in.


Once your batter has settled, give it a few stirs and put a piece of bread in. I'm using sunflower spelt bread I made the other day.


Flip the bread over with a fork and let the other side have a chance to soak up some batter.


Take the coated slice of bread out of the bater and dredge it in the coconut. You can sprinkle some extra coconut onto the bare areas if there are any. It's up to you how much coconut you want on it.


Heat up a skillet and grease it with a little vegan margarine.


Put the battered and coconutted bread on the skillet and start it cooking.


You want the coconut to develop a good brown color on both sides and give the batter a chance to cook. If it's turning black, it's been on too long.

Now cut your fruits up.


This "French" toast is good with agave nectar or maple syrup drizzled on. Some marmalade on the side wouldn't be a bad idea, either.


Variations:
Soy flour or two eggs worth of egg replacer will work in substitution for the rice flour. Cinnamon raisin or date nut bread would work well, as long as the bread is a day or two old and won't get all mushy in the batter. Instead of coconut, you could use finely chopped nuts, although this is agreeably a more substantial way to make them.

April 21, 2006

Cardamom Pear Cookies

When I made these, I had a potluck at work to go to the next day, to which most people brought leftovers from their church potluck. Mind you, the next day was Friday. Who knows how old that food was. Anyway, it was chock full of cheese and mayo, so I kept to my cookies.

Pear goes good with cardamom. If you're bringing some to your elderly grandmother, you might want to try adding a bit of lavender, too.

Ingredients:
1 3/4 cups flour
3/4 cups brown sugar
2 pears (ripe)
3 tablespoons flaxseed meal
1 banana (ripe)
3 tablespoons vegan margarine
2 teaspoons cardamom
1 teaspoon vanilla
1/4 teaspoon salt

Preheat oven to 350 degrees


Mix flour, sugar, cardamom, and salt in a medium size bowl.


Now get your flaxseed meal ready by mixing it in a little bowl or mug with 5 tablespoons of water. Let it set, soaking for 10 minutes or so.


Mush the banana and the margarine into the flour with a pastry cutter (or a potato masher, like I'm using).


Mix everything together until crumbly.


Peel, core, and dice the pears.


By now, the flaxseed meal shoudl be done. Add the pears, flaxseed meal, and vanilla.


Mix it all very well. Don't be afraid to use your hands (wash them first).


Drop spoonfuls of the dough onto greased cookie trays, placing them 1 to 2 inches apart. They won't spread out that much during baking, but you don't want to risk getting one large mass of cookie, instead of the small ones you intended on baking, portable as well as delicious.


Bake the cookies for 25-30 minutes at 350. When they come out, take them off the trays and set them out to cool.


Variations:
The first time I made cookies like these, they came out all doughy and chewing them was a real task. I'm not about to fiddle with cookie recipes anymore, just so that doesn't happen. You could sustitute 2 cups cranberries, raisins, or apples for the pears, but not just any fruit works with cardamom. Make sure you do a little research first before you wind up with 24 cute little dough bombs.